Pro Program Live Chat +8619050185756

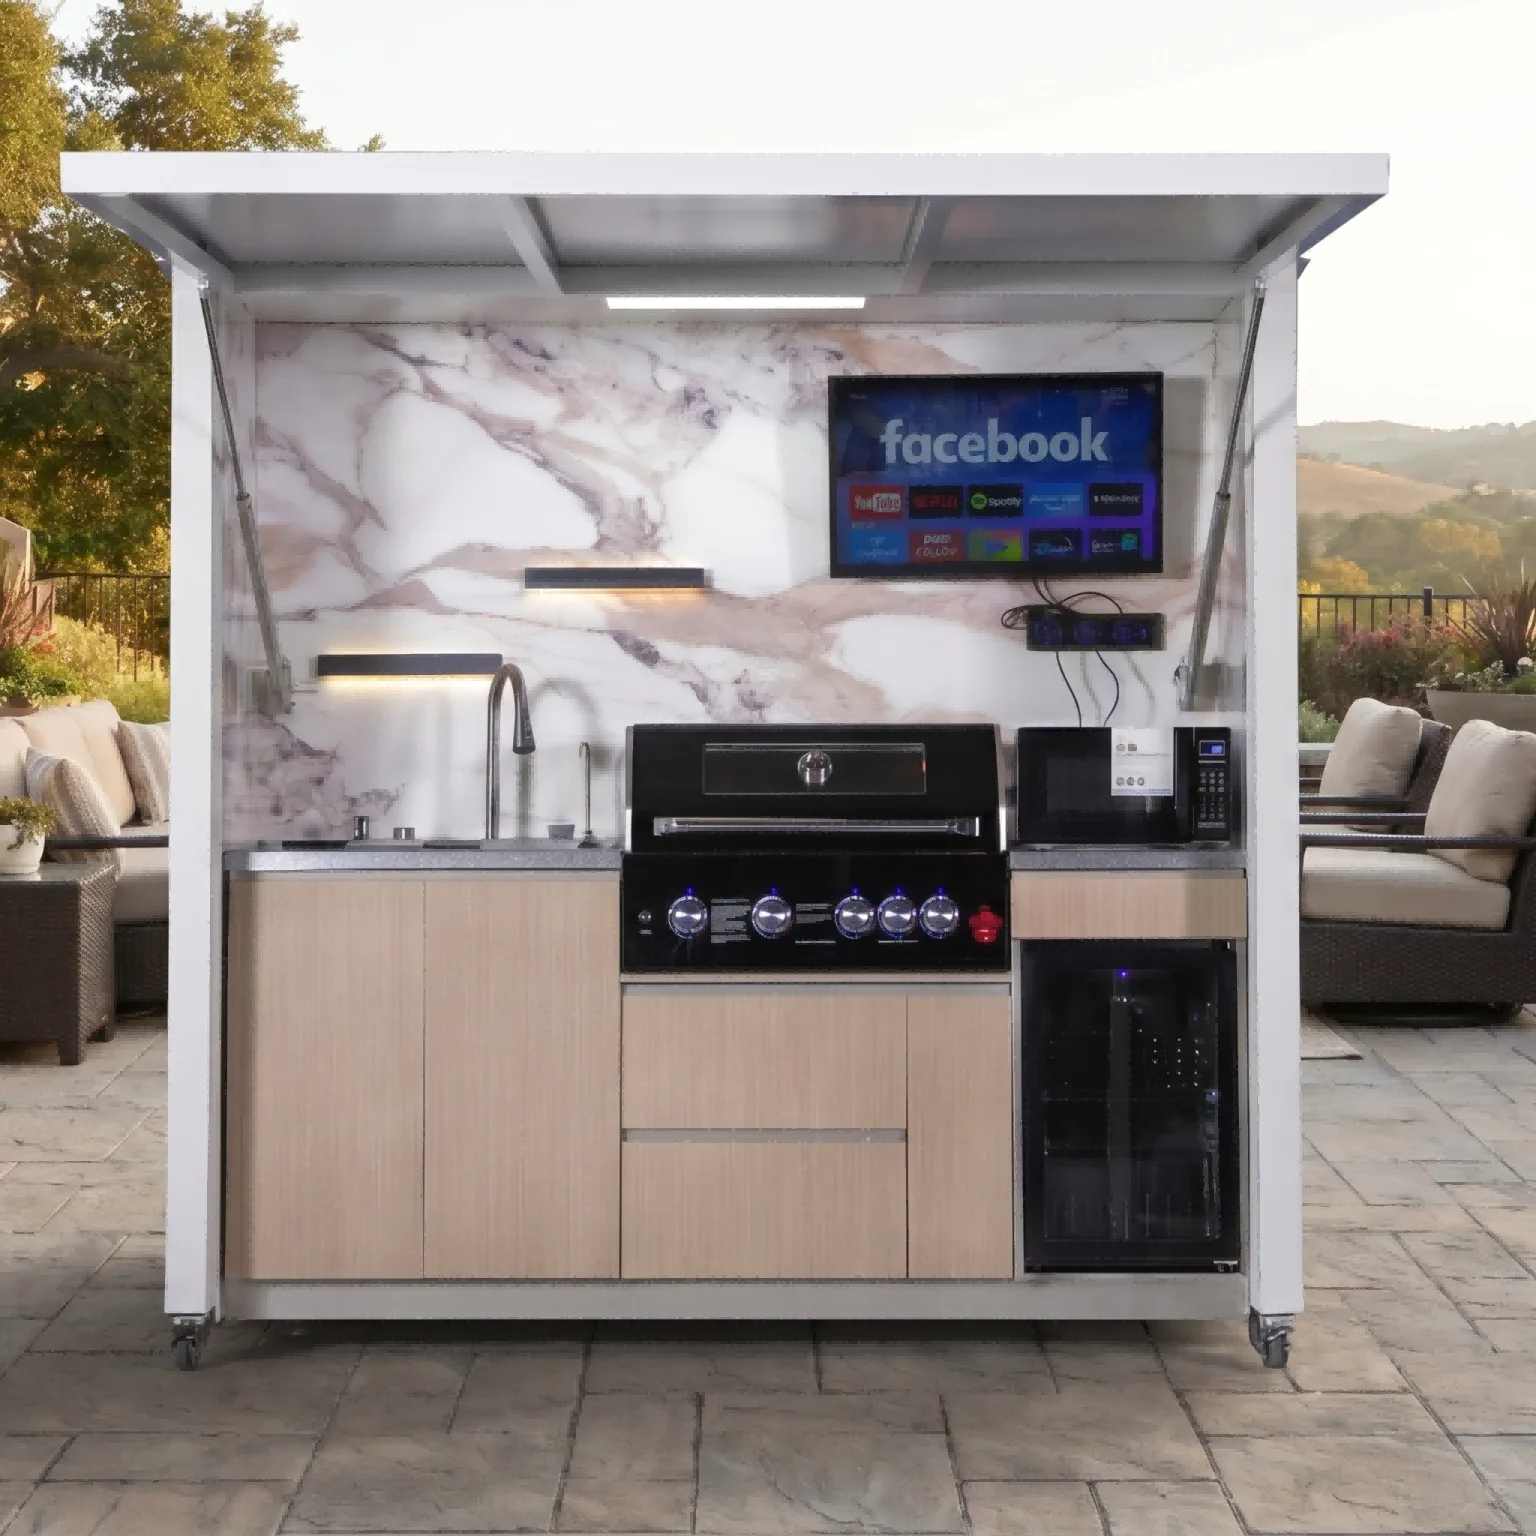
A good outdoor kitchen lighting plan uses three layers: focused task lighting for the grill, sink, and counters; low-glare ambient lighting for dining and conversation; and safety lighting for steps, paths, edges, and controls. Choose fixtures for their actual outdoor exposure, place them before roof and electrical work is finalized, and use dimmers or separate controls so the kitchen is bright when preparing food but comfortable when guests sit down.
One bright fixture in the center of a patio rarely solves every need. It can cast the cook’s shadow onto the grill, create glare for seated guests, and leave steps or appliance controls difficult to see. Layering smaller, better-aimed sources usually produces a more useful result.
Start With Activities, Not Fixture Styles
List what happens in each part of the outdoor kitchen after sunset. The grill needs clear visibility of food, controls, utensils, and landing areas. The sink needs light for washing and cleanup. Preparation counters need even illumination without harsh reflections. Dining areas need enough light to see food and faces while preserving a relaxed atmosphere.
Then map circulation: the door from the house, path to the kitchen, pool gate, steps, changes in elevation, trash route, and utility shutoffs. Lighting should support these tasks without shining into windows, neighboring property, or the cook’s eyes.
Layer 1: Task Lighting for Cooking and Preparation
Task lighting should reach the actual work surface from a direction that does not place the user between the fixture and the task. A light directly behind the cook often creates a shadow over the grill. Fixtures above or slightly forward of the work area can be more effective when permitted by the appliance and structure.
Plan separate task light for:
- The grill grates and control panel
- Landing space beside hot appliances
- The primary cutting and preparation counter
- The sink and faucet
- Refrigerator and storage access
- Trash and cleanup area
Heat-producing appliances require special care. Lighting, wiring, drivers, lenses, and mounting hardware must remain outside prohibited heat and fire-clearance zones. Use the exact appliance instructions and have electrical and fire-related details reviewed by appropriately qualified local professionals.
Avoid Glare on Shiny Surfaces
Stainless steel, polished stone, glass doors, televisions, and glossy backsplashes can reflect bright sources. A fixture that looks attractive when switched off may create a distracting hotspot at night.
Use shielded fixtures, diffuse light where appropriate, and test aiming from the cook’s and guests’ eye positions. Lighting the counter from more than one modest source can feel better than using one intense lamp. Avoid placing exposed light sources directly in the normal line of sight.
Layer 2: Ambient Light for the Outdoor Room
Ambient lighting establishes the overall brightness and mood. It may come from a pergola or pavilion ceiling, wall-mounted fixtures, shielded pendants, indirect lighting, or carefully aimed landscape lights. The goal is orientation and comfort, not making the patio look like a retail showroom.
Keep the dining area slightly calmer than the work zone. Guests should be able to see food and faces without sitting beneath a harsh source. Separate controls allow the cook to use stronger task lighting during preparation and lower the overall level after serving.
Layer 3: Path and Edge Lighting
Low-level lighting can identify stairs, patio edges, transitions, gates, and the route back to the house. Place light where it reveals the walking surface rather than shining upward into people’s eyes.
Pay attention to dark gaps between a bright kitchen and the surrounding yard. The eye adjusts to the illuminated work area, which can make an unlit step nearby harder to see. A continuous visual path is more useful than isolated decorative fixtures.
Select Fixtures for the Actual Outdoor Exposure
A covered fixture is still outdoors. Wind-driven rain, condensation, humidity, insects, grease, cleaning spray, temperature swings, and irrigation can reach protected areas. Verify that every luminaire, junction box, driver, transformer, switch, control, and connection method is suitable for its specific location.
Do not rely on vague terms such as “weatherproof” without checking documented ratings and installation instructions. A fixture acceptable beneath a fully protected ceiling may not be appropriate on an exposed post or beside a sink. A qualified electrician should select and install components according to applicable requirements.
Color Temperature and Color Quality
Warm or warm-neutral light generally creates a comfortable residential atmosphere and complements food and natural materials. Very cool light can make the patio feel clinical and may compete with the warmer interior lighting seen through nearby windows.
Consistency matters. Mixing noticeably different color temperatures across the grill, ceiling, and landscape can make an otherwise premium project feel accidental. Select a coordinated family or review samples together after dark.
Color quality also affects how accurately food appears. Compare fixtures using the manufacturer’s documented color-rendering information rather than judging only by wattage or a daytime showroom display.
Use Responsible Outdoor Lighting Principles
DarkSky International and the Illuminating Engineering Society summarize responsible outdoor lighting as useful, targeted, low level, controlled, and warm-colored. Their Five Principles for Responsible Outdoor Lighting provide a practical framework for residential projects.
Apply those principles by directing light downward toward tasks, using no more brightness than needed, shielding sources, dimming after cooking, and turning lights off when the area is not in use. This can reduce glare, light trespass, energy use, and unnecessary impact on the night environment.
Controls Make Layered Lighting Useful
Separate task, ambient, path, and accent lighting into logical control groups. One switch for everything forces the homeowner to choose between too bright and too dark. Dimmers can help transition from active cooking to dining, provided the fixtures and control equipment are compatible.
Timers, schedules, or occupancy controls may be useful for paths and general lighting. Manual override should remain simple. Avoid complicated controls that require a phone application for basic cooking light. Label switches and locate them where someone can reach them before entering a dark area.
Coordinate Lighting With Fans, Hoods, Heaters, and Roofs
Covered outdoor kitchens often combine lighting with ceiling fans, heaters, powered louvers, speakers, televisions, and ventilation equipment. Lay these elements out together. A fan blade can create flicker or moving shadows beneath a light. A heater can conflict with fixtures and wiring. A hood may block a ceiling fixture or require its own integrated task lighting.
If a roof, shutter, or canopy moves, check lighting and wiring in every position. Flexible connections, cable routing, switches, and maintenance access must follow the system documentation. Structural, electrical, gas, fire-clearance, and permit decisions should be made by qualified local professionals.
Do Not Forget Service and Cleaning
Grease, pollen, dust, insects, and moisture reduce light output. Choose fixtures that can be cleaned safely and accessed without leaning over a grill or disassembling the roof. Confirm how lenses open, where drivers are located, and whether replacement components remain accessible.
Turn power off and follow manufacturer instructions before cleaning. Do not spray electrical fixtures or controls simply because they are outdoors.
Outdoor Kitchen Lighting Zones Compared
| Zone | Primary purpose | Common mistake |
|---|---|---|
| Grill | See food, controls, and landing areas | Fixture behind the cook creates a shadow |
| Prep counter | Cutting, plating, and reading recipes | Glare from polished counters |
| Dining | See food and faces comfortably | Overlighting the table |
| Path and steps | Reveal changes in elevation and routes | Bright sources aimed at eye level |
| Storage and service | Find tools, shutoffs, and equipment | Ignoring dark cabinet interiors and access panels |
| Landscape | Provide depth and orientation | Unshielded uplight and neighbor spill |
Lighting Planning Checklist
- Map every nighttime task and travel route.
- Place task lighting at the grill, sink, and preparation counters.
- Check shadows from the cook’s normal position.
- Test glare from steel, glass, stone, and screens.
- Use fixtures rated for the actual exposure.
- Coordinate color temperature across the project.
- Separate task, ambient, path, and accent controls.
- Use dimming where compatible and practical.
- Shield and aim light only where needed.
- Coordinate fans, heaters, hoods, roofs, and moving panels.
- Preserve cleaning and electrical service access.
- Have wiring and controls installed by qualified professionals.
When comparing configurations, review the Yuquanqiu outdoor kitchen collection and request the exact model’s lighting, electrical, roof, and appliance documentation before rough-in work. Integrated lighting shown in a photograph should be confirmed for the selected configuration rather than assumed standard.
Frequently Asked Questions
What is the best light color for an outdoor kitchen?
Warm or warm-neutral light often feels comfortable and makes food and residential finishes look natural. Coordinate fixtures and review actual samples; the best selection depends on the surrounding architecture and tasks.
Where should a grill light be placed?
Place it so the cook does not block the beam and so it illuminates the grates and landing areas without glare. Follow grill and roof clearances and use equipment suitable for the heat and outdoor location.
Can I use indoor fixtures under a covered patio?
Do not assume a roof makes an area equivalent to indoors. Select fixtures and electrical components approved for the actual damp or wet exposure and installation conditions.
Should outdoor kitchen lights be on a dimmer?
Dimmers are useful for transitioning from cooking to dining when the fixtures, drivers, and controls are compatible. Keep critical path or task lighting available at a practical level.
Do I need lighting inside outdoor cabinets?
It can help in deep drawers or service compartments, but fixtures must not block vents, utilities, or maintenance access. Automatic door switches may be convenient if approved for the environment.
Who should install outdoor kitchen lighting?
A qualified electrician should design and install permanent wiring, circuits, controls, grounding, and outdoor-rated equipment according to the product documentation and applicable local requirements.
Use Light Where It Improves the Experience
Outdoor kitchen lighting should make cooking easier, movement clearer, and dining more comfortable. Start with tasks, layer the light, control each zone, reduce glare, and coordinate fixtures with the structure and appliances. A thoughtful plan uses less light more effectively—and makes the kitchen feel inviting long after sunset.