Pro Program Live Chat +8619050185756

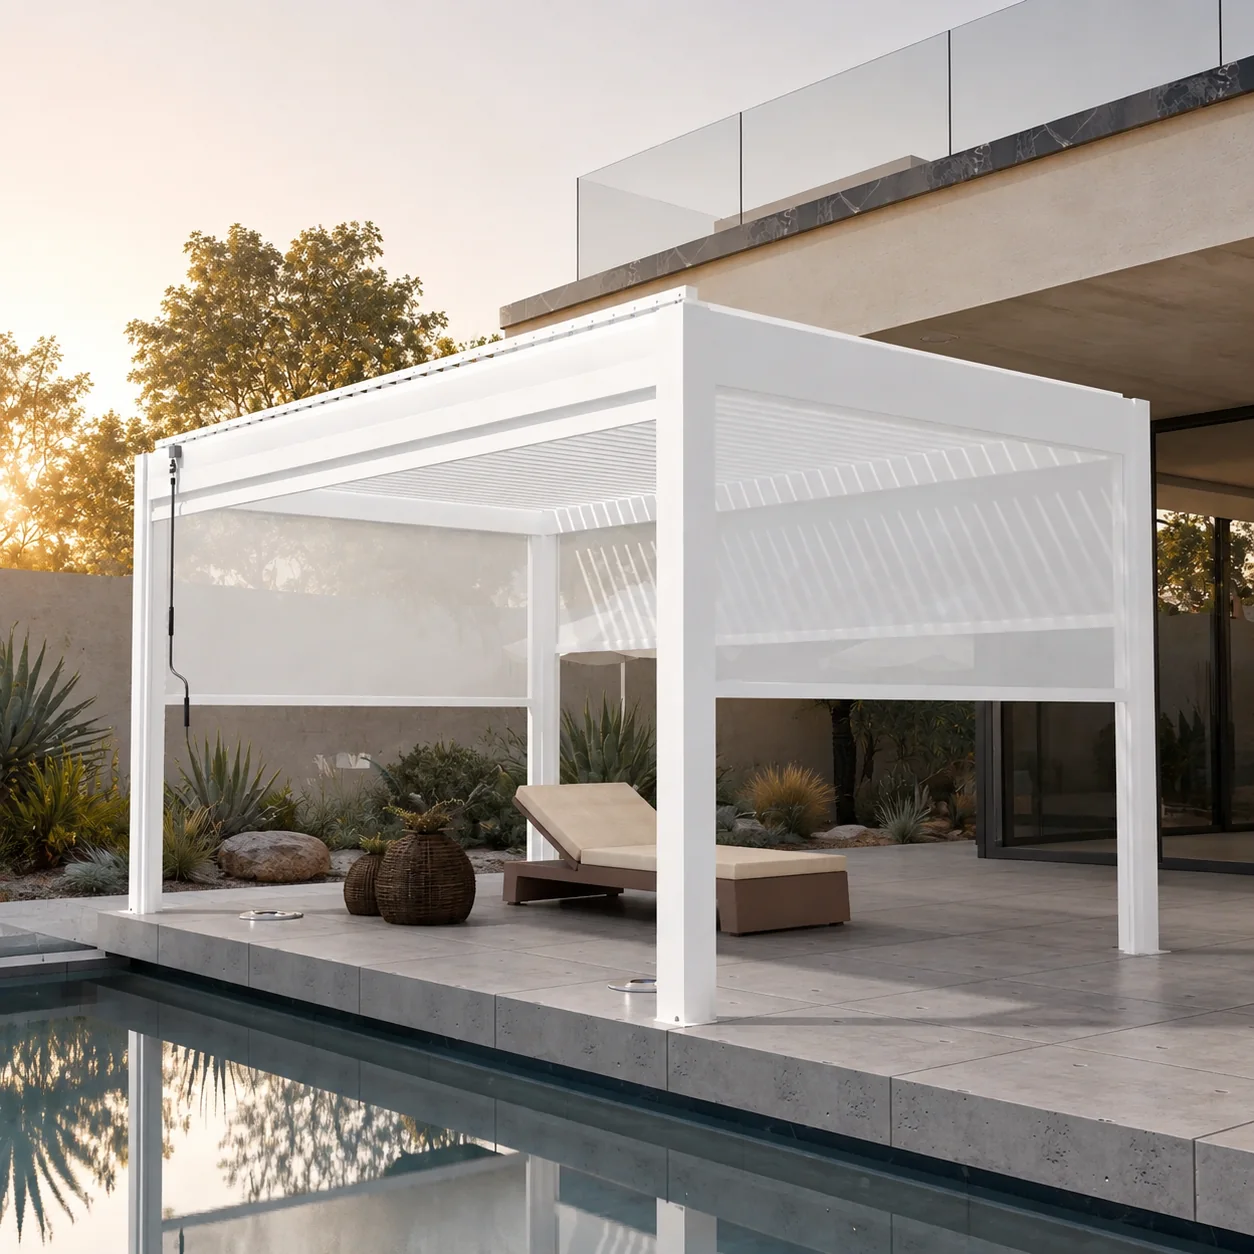
A pergola does not have to make your home too dark if its height, setback, footprint, louver orientation, color, and operating range are planned around the actual windows and seasonal sun. The most reliable approach is to test the proposed structure from inside the house before ordering, then use adjustable louvers to balance patio shade with daylight and sky view.
Why a pergola can change indoor light
Windows receive light from direct sun, bright sky, and reflection from the ground and nearby surfaces. A roof structure can affect all three. A low, deep pergola placed directly outside a window may block more sky than a taller structure set farther away. Dark framing and finishes can also make the view feel visually heavier even when measured light remains adequate.
The effect varies by property. Window size, room depth, ceiling height, overhangs, trees, neighboring buildings, orientation, latitude, season, and interior finishes all matter. Do not judge only from an exterior rendering.
1. Identify which rooms depend on the patio windows
List the rooms facing the proposed pergola. A kitchen with windows on two sides may tolerate more shade than a deep family room with one glass door. Note where daylight is most important for cooking, reading, artwork, plants, or a home office.
Observe each room in morning, midday, and late afternoon. Repeat the observation in more than one season if the project schedule allows. Take photographs from the usual seated and standing positions, not only from the center of the room.
Indoor viewpoints to document
- Main kitchen work surface
- Dining table and breakfast area
- Primary sofa or reading chair
- Hallway looking toward the patio
- Home-office desk and computer screen
- Important artwork, plants, or architectural features
2. Study the sun path and sky view
A pergola on one side of a home may control intense afternoon sun while having little effect on morning light. On another orientation, the same dimensions can shade windows for much of the day. Existing trees and eaves may already block part of the sky.
Use site observations and a qualified designer’s solar study when daylight is a major priority. Generic compass advice is not enough because terrain, nearby structures, window position, and seasonal sun angles change the result.
3. Test the full-size footprint and height
Mark post positions on the patio and use temporary poles, string, or a simple digital model to represent the roof edges. View the mockup from inside. The edge closest to the house often has the strongest effect on visible sky.
Compare more than one height and setback. Moving the structure a modest distance away from a window may preserve a strip of sky and make the interior feel brighter. However, placement must also account for foundations, anchoring, drainage, doors, utilities, wind, snow, property restrictions, and local permits.
Model-specific documentation and qualified local professionals or authorities control all structural and installation decisions. Do not change post spacing or height beyond the approved configuration simply to improve a view.
4. Understand how motorized louvers affect light
Adjustable louvers can admit more sky light when open and provide more shade when closed. Ask the supplier to explain the opening range, louver direction, controls, and recommended operating positions for the exact model. The visual result depends on the camera angle and sun, so photographs of another installation may not predict your room.
Consider normal habits. If the louvers will remain closed most of the time for privacy or rain concerns, the theoretical open condition may not describe everyday daylight. Make a realistic operating plan for clear, hot, rainy, and cold days.
5. Choose louver orientation with both rooms and patio in mind
Louver direction can influence which portions of sky and sun are visible at different angles, but there is no universal best orientation. The frame span, drainage design, motor system, building relationship, and model engineering may limit available choices.
Ask the supplier and designer to evaluate the exact orientation rather than rotating a generic plan. Structural, drainage, wind, snow, and installation documentation for the selected configuration must control.
6. Use color and reflectance strategically
A light-colored pergola can feel visually brighter and may reflect more ambient light toward the patio than a dark finish. A dark structure can create elegant contrast but may appear heavier outside large windows. Both can work when coordinated with the home.
Review physical finish samples beside the exterior wall and window frame in real daylight. Also consider paving. Light stone or concrete may bounce more light than a dark deck, although glare, heat, staining, slip resistance, and maintenance must also be considered.
7. Protect glass doors and windows
Confirm that posts, screens, gutters, controls, and furniture do not obstruct door operation or the primary view. A post directly in front of a narrow window can feel more disruptive than a larger roof placed with careful alignment.
If retractable side screens are planned, model both raised and lowered conditions. Screens may reduce glare and add privacy, but they can also reduce daylight and views. Do not treat them as permanent walls or structural wind protection unless verified documentation explicitly supports that use.
8. Coordinate attached and freestanding options
An attached pergola may begin close to the facade, while a freestanding structure can sometimes be set back to preserve light. Attachment is not merely a visual decision. It can introduce structural, flashing, waterproofing, drainage, and permit requirements.
Ask whether the exact product is designed for the proposed condition. Qualified local professionals must evaluate the house, connection, foundations, utilities, and local requirements. Never improvise an attachment or remove posts without verified documentation.
9. Keep landscape shade in the calculation
Existing trees may create more indoor shade than the pergola, especially in summer. Deciduous trees can admit more winter light, while evergreens may block sky throughout the year. Future plant growth matters too.
Coordinate pruning with a qualified arborist rather than cutting limbs simply to compensate for a poorly placed structure. Landscaping can soften the pergola, but keep plants away from drainage, motors, screens, anchors, and service access.
10. Plan artificial lighting as support, not compensation
Good interior and patio lighting can improve comfort after dark, but it should not be the only answer to a daylight problem. First optimize placement, height, louvers, and finishes. Then add layered task, ambient, and path lighting.
Avoid bright exterior fixtures shining through windows or reflecting from glass. Provide separate control for the pergola, dining, landscape, and interior zones. Outdoor electrical work requires qualified local installation using current product documentation and applicable rules.
Daylight design comparison
| Decision | More daylight-friendly tendency | Tradeoff to verify |
|---|---|---|
| Setback | More space between roof and window | Patio coverage and property limits |
| Height | Higher visible sky angle | Scale, engineering, wind, privacy |
| Finish | Lighter surfaces feel brighter | Glare, appearance, maintenance |
| Louvers | Open position admits sky light | Sun, rain, operating guidance |
| Screens | Raised condition preserves views | Shade and privacy needs |
11. Perform a simple before-and-after daylight test
Before ordering, photograph the room at consistent times and note whether electric lights are needed. Use the proposed model or mockup to compare alternative footprints. For sensitive spaces, a designer can create a daylight study using verified site geometry.
A rendering can help, but confirm its assumptions: date, time, location, window glass, interior surfaces, trees, neighboring buildings, louver position, and pergola dimensions. An attractive visualization is not proof of performance.
Pre-order daylight checklist
- Observe adjacent rooms at several times of day
- Identify primary windows and interior viewpoints
- Map seasonal sun, trees, eaves, and neighboring shade
- Mock up the roof edge, height, and post locations
- Compare attached and freestanding placement if supported
- Review louver orientation and opening range
- Test finish samples and paving outdoors
- Model side screens in raised and lowered positions
- Confirm structure, drainage, utilities, and permits locally
- Save approved dimensions and operating documentation
Frequently Asked Questions
Will a pergola block all sunlight from my windows?
Usually not, but the change depends on height, depth, setback, orientation, louvers, screens, trees, and the window. Test the exact design from inside the room before ordering.
Is a white pergola better for daylight than a black pergola?
A light finish may feel brighter and reflect more ambient light, while a dark finish can create stronger contrast. Placement and geometry generally matter more than color alone. Review real samples on site.
Should louvers run toward or parallel to the house?
There is no universal answer. Sun, views, frame engineering, drainage, and the exact product all matter. Use model-specific options and professional site analysis.
Can a pergola help reduce interior glare?
It may shade intense direct sun near glass, but results vary. Evaluate the actual sun path, windows, screens, and louver positions rather than relying on a general claim.
Can I raise the pergola after it is installed?
Do not modify posts or foundations casually. Height affects structure, anchoring, utilities, drainage, and permits. Any change needs verified product documentation and qualified local review.
Evaluate the pergola from inside and outside
Explore Meta Lifestyle’s motorized louvered pergola options while considering interior daylight, patio comfort, and the house elevation together. To discuss a project, use the Request a Quote form and include exterior and interior photographs, window locations, approximate dimensions, preferred placement, and daylight priorities.