Pro Program Live Chat +8619050185756

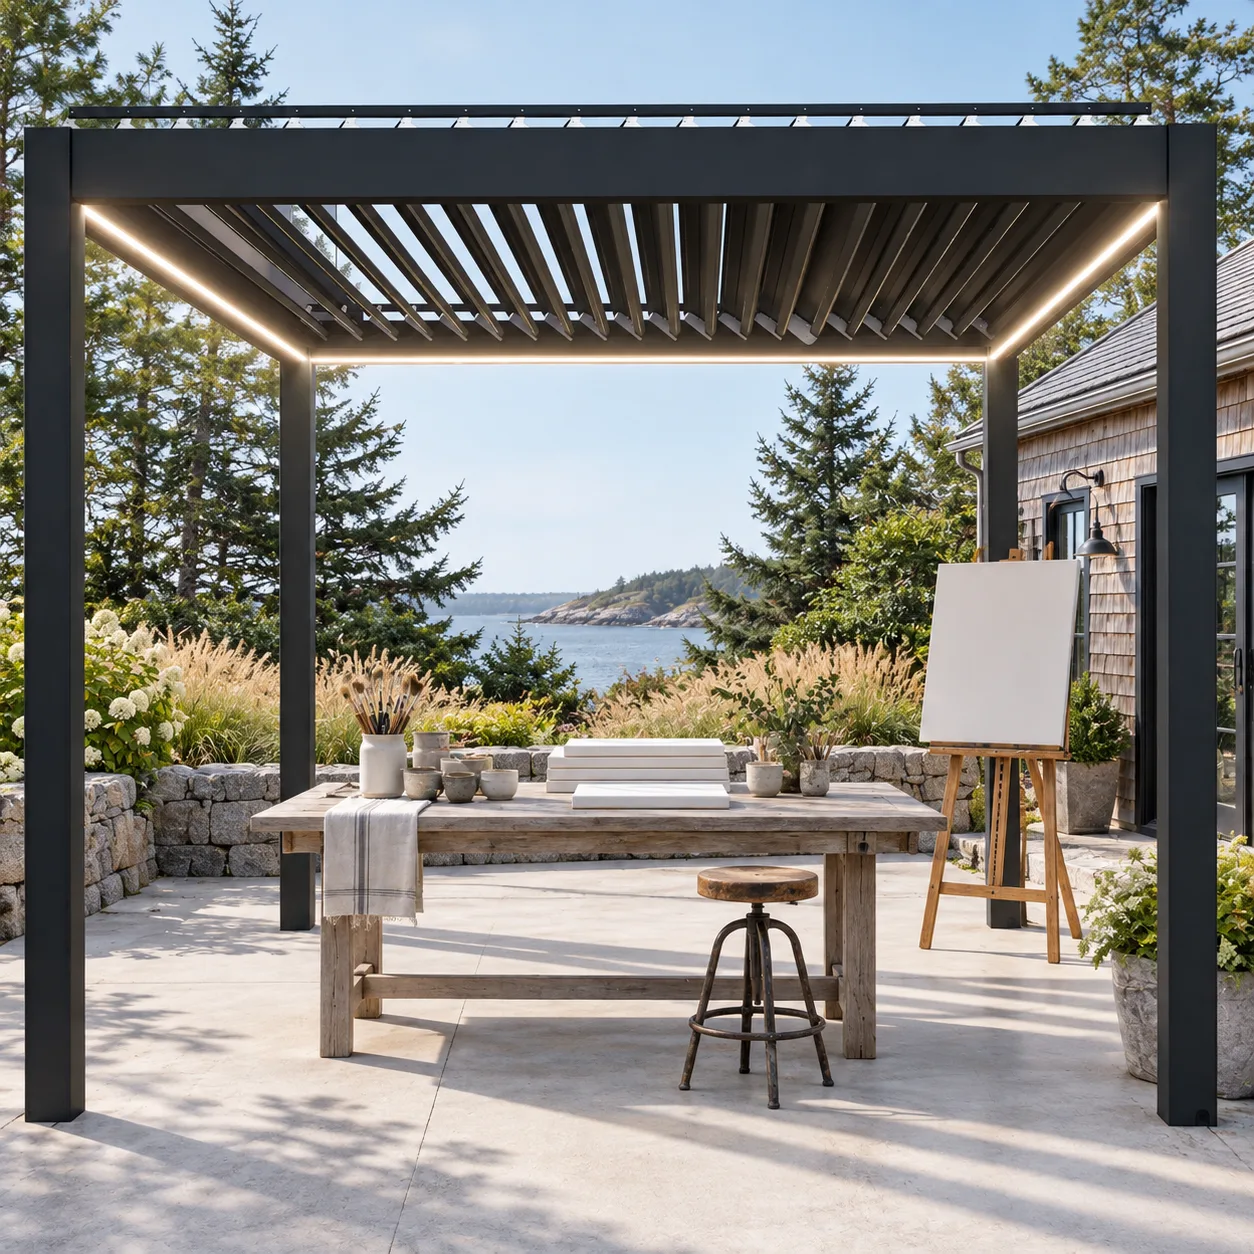
A motorized pergola can create an excellent outdoor art studio when it is planned around controllable daylight, a washable work zone, protected storage, and a clear bad-weather routine. The adjustable louvers can help an artist shift between open sky and shade, but an open-sided pergola is not a climate-controlled room. Start by listing the media you use, the size of your work, the light you prefer, and which materials must stay indoors. Then design the structure, floor, utilities, and storage around that real workflow.
Define the Work Before Choosing the Pergola Size
A watercolorist, ceramic sculptor, furniture maker, and portrait painter need very different spaces. Write down the largest canvas, clay piece, table, easel, drying rack, or tool cart you expect to use. Include the room needed to step back and view the work, not just the footprint of the furniture.
Make a full-scale floor plan with painter’s tape. Mark the pergola posts, worktable, stool, easel, storage, sink or wash station, and walking path. Test whether a large canvas can be carried into the space without turning it vertically or striking a beam. The resulting working envelope is the basis for pergola sizing.
Three zones make the studio easier to use
- Clean planning zone: sketches, reference material, photography, and finished work.
- Active making zone: the primary table or easel with suitable light and floor protection.
- Cleanup and storage zone: tools, approved containers, waste, and any water access.
Keeping clean and messy tasks apart helps prevent splashes, dust, or clay from reaching finished pieces.
Use the Louvers to Shape Daylight
Artists often value consistent, diffuse light. Direct sun can create harsh contrast, glare, heat, and rapid drying, while deep shade can make color judgment difficult. Observe the site throughout the hours you expect to work and across more than one season.
Orient the work surface so changing sun does not fall directly into the artist’s eyes or create a bright reflection on wet paint. Motorized louvers can adjust overhead light, but low-angle sun enters from the sides. Compatible screens or nearby landscape may help, provided they preserve airflow, service access, and the structure’s operating requirements.
Create a simple lighting test
- Place a white, middle-gray, and dark sample board on the proposed work surface.
- Photograph it in morning, midday, and afternoon light.
- Note where glare appears on glossy media or tablet screens.
- Test the sightline from both seated and standing positions.
- Identify when supplemental task lighting becomes necessary.
This test provides more useful information than selecting the pergola orientation from a compass direction alone.
Select a Floor That Supports the Medium
The studio floor should be stable, easy to clean, and suitable for the intended furniture or equipment. A smooth surface makes rolling carts easier, but it must also provide appropriate slip resistance when wet. Grout lines, textured pavers, and uneven joints can complicate cleanup or table leveling.
Plan drainage before choosing finishes. Water or cleaning residue must not collect around pergola anchors or run into planting beds without approval. Painting solvents, glaze residues, clay, plaster, and other art materials should never be washed into drains, soil, or stormwater unless the product instructions and local rules explicitly allow it. Follow material safety information and local disposal guidance.
Protect Materials From Weather
Closed louvers can provide overhead protection during suitable conditions, but wind-driven rain, humidity, dust, temperature changes, and insects can still enter from open sides. Never assume the area is waterproof or climate controlled. Follow the exact pergola manual for rain, wind, snow, freezing conditions, and power loss.
Store paper, canvas, electronics, pigments, adhesives, wood panels, and finished work according to their manufacturers’ environmental requirements. Weather-resistant cabinets may hold appropriate tools, but sensitive or hazardous materials may still need approved indoor storage. Establish a short checklist for bringing work inside when conditions change.
Compare Enclosure Options
| Studio edge | Potential benefit | Tradeoff to evaluate |
|---|---|---|
| Fully open sides | Strong airflow and connection to the landscape | More wind, dust, low sun, and wind-driven moisture |
| Retractable shade screens | Flexible glare and sun control | May alter color perception and reduce airflow |
| One adjacent solid wall | Useful background and protection from one direction | Permits, reflected light, heat, and ventilation |
| Portable studio panels | Flexible display or backdrop | Must be secured safely and kept clear of moving components |
Screens are not automatically storm barriers. Confirm their intended use, edge details, wind limits, and compatibility with the exact pergola model.
Plan Power and Supplemental Light Safely
Task lights, photography equipment, small tools, pottery wheels, and device charging can create different electrical demands. List all expected equipment and share the actual ratings with a licensed electrician. Outdoor receptacles, circuits, protective devices, wiring methods, grounding, bonding, controls, and disconnects must meet the product documentation and local requirements.
Do not drill into beams or hang lights, fans, cameras, or storage from the pergola without written approval for the exact configuration. Weight, wind, headroom, wiring, louver movement, and weather exposure all matter.
Ventilation Is Not the Same as Chemical Safety
An open-sided studio may feel airy, but that does not make every solvent, spray, resin, kiln, or dusty process appropriate beneath a pergola. Review labels and safety data for each material. Some products require respiratory protection, controlled ventilation, fire-safe storage, or a purpose-built indoor workspace.
Keep incompatible materials separated and away from heat, ignition sources, children, pets, drains, and food areas. Never operate a kiln, torch, spray booth, or other specialized equipment under the structure unless the equipment manufacturer, pergola provider, qualified professionals, and local authority have approved the complete installation.
Design Storage Around the Changeover
A pleasant outdoor studio should convert from working mode to protected mode quickly. Use movable tables or carts only when their wheels lock securely on the selected floor. Give brushes, tools, drop cloths, and drying pieces defined locations so the work surface can be cleared before weather arrives.
Keep cabinets outside required post, motor, gutter, screen, and electrical service zones. Do not block drainage outlets. Maintain a clear route between the studio and the indoor storage area for large work.
Outdoor Studio Planning Checklist
- List media, largest work size, equipment, and environmental limits.
- Mock up the full work and viewing envelope at actual scale.
- Observe daylight, glare, heat, and prevailing wind at working hours.
- Choose a stable, cleanable floor with approved drainage.
- Separate clean work, active making, cleanup, and storage zones.
- Confirm which materials must remain indoors.
- Plan outdoor-rated lighting and power with qualified professionals.
- Keep furniture and storage clear of posts, motors, gutters, screens, and controls.
- Document a bad-weather shutdown and move-in routine.
- Have qualified local professionals or authorities confirm structure, anchoring, wind, snow, drainage, electricity, fire safety, and permits.
Review the META LIFESTYLE shade structure collection as a starting point, then request model-specific drawings and operating information for your studio plan.
Frequently Asked Questions
Is a motorized pergola waterproof enough for art supplies?
Do not treat it as a climate-controlled room. Protection depends on the exact roof system, drainage, wind, rain direction, and operating limits. Sensitive supplies should be stored according to their manufacturers’ requirements, often indoors.
Which pergola direction gives the best artist light?
There is no universal answer. Site latitude, surrounding buildings, trees, working hours, seasons, and preferred medium all affect the result. Test the proposed location with sample boards at the hours you expect to work.
Can I install a utility sink beneath the pergola?
Possibly, but water supply, drainage, winterization, wastewater, and permitted uses must be designed for the site. Art materials should not enter drains unless their instructions and local rules explicitly permit it.
Can lights or drying racks hang from the beams?
Only with written approval for the exact pergola and attachment. Added weight, wind, wiring, headroom, louver movement, and structural capacity must be verified before anything is mounted.
Can I use spray paint or resin under a pergola?
Do not assume open sides make the activity safe. Follow labels and safety data, including ventilation, protective equipment, ignition control, and environmental conditions. Some processes require a purpose-built workspace.
How do I request a pergola quote for an outdoor studio?
Send site dimensions, photos, worktable and easel sizes, preferred working hours, flooring information, storage needs, electrical equipment, and screen preferences through the META LIFESTYLE Request a Quote page. Both +8619050185756 and +1 (626) 735-5685 are official META LIFESTYLE WhatsApp contacts.
Create a Studio That Adapts With the Work
The strongest outdoor art studio is not tied to one perfect weather condition. It uses adjustable shade, a durable floor, disciplined storage, safe utilities, and a practical shutdown routine to make more days workable. Plan around the artist’s real process first, then choose the pergola configuration that supports it without pretending an outdoor room is an indoor one.